Painting a ceiling can be a challenging task, especially when trying to avoid unsightly splatters. Whether you’re refreshing your ceiling’s look or painting it for the first time, achieving a clean, professional finish without splatters requires a careful approach.
Many people worry about drips and splashes staining their floors and furniture, but with the right techniques, tools, and preparation, you can keep the mess to a minimum.
This detailed guide will walk you through how to paint your ceiling step-by-step, ensuring that the paint goes exactly where you want it to—on the ceiling and not on your floors or walls. Follow these simple tips to achieve a smooth, splatter-free finish that will transform your room.
Preparation Is Key: Setting Up Your Workspace
Before you begin painting, proper preparation of your workspace is essential for keeping splatters at bay. A well-prepared area not only saves time but also ensures a neater, cleaner painting job.
Materials Needed:
- Drop cloths or plastic sheets
- Painter’s tape
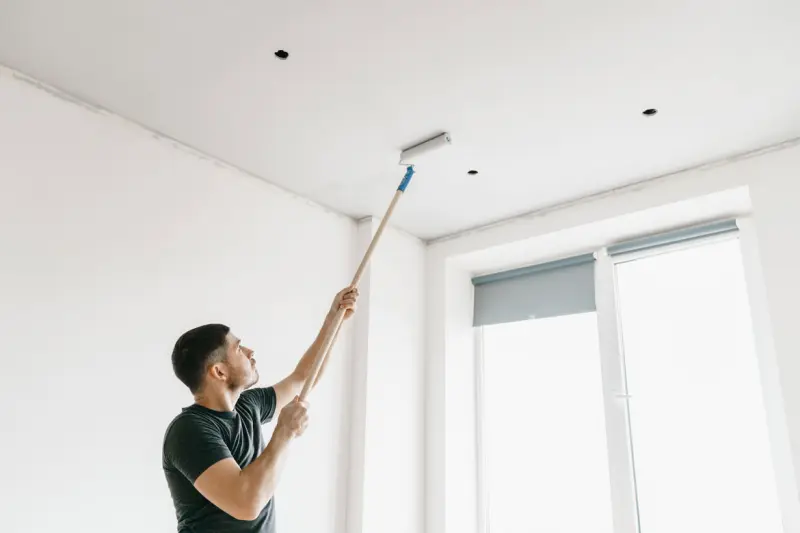
- Paint roller with an extension pole
- Angled paintbrush
- Roller tray
- Paint
- Ladder
- Safety goggles and mask
Step-by-Step Preparation:
- Clear the Room: Remove as much furniture from the room as possible. If you cannot remove larger pieces, move them to the center of the room and cover them with drop cloths or plastic sheets.
- Cover Floors and Walls: Lay drop cloths or plastic sheets on the floor to protect it from any accidental drips. Use painter’s tape along the edges of the walls where they meet the ceiling to prevent paint from getting on them.
- Wear Protective Gear: To avoid paint splattering onto your face or eyes, wear safety goggles and a mask.
By preparing your space effectively, you’ll minimize the risk of splatters and make clean-up much easier.
Choosing the Right Tools to Prevent Splatter
Selecting the right tools for the job is crucial when aiming for a splatter-free ceiling painting project. Using the appropriate brushes, rollers, and other equipment will help you apply paint more evenly and with less mess.
Tools for the Job:
- Roller with a Short Nap: Choose a paint roller with a short nap (3/8-inch or less). Rollers with longer naps tend to hold more paint, increasing the chances of splattering. A short nap will provide a smooth application without excess paint dripping.
- Angled Brush: For edges and corners, an angled brush allows you to apply paint precisely without creating splatters.
- Roller Shield: Attach a roller shield to your roller to catch any splatters that may occur while painting. This will help keep the area clean.
Using the Right Paint:
- Ceiling-Specific Paint: Using paint specifically designed for ceilings is recommended. Ceiling paint is formulated to drip less, dry faster, and hide imperfections better than regular wall paint. This type of paint is often thicker, helping to reduce splatters.
Techniques for Splatter-Free Ceiling Painting
Painting a ceiling without splatter is all about using the correct techniques. With the right motion and paint application, you can achieve a smooth, flawless finish.
A. Cutting In: Starting with the Edges
Cutting in refers to painting along the edges of the ceiling where it meets the walls. This should be done before rolling the rest of the ceiling.
- Load the Brush: Dip your angled brush in the paint, but don’t overload it. Tap off any excess paint on the side of the can.
- Paint the Edges: Apply the paint carefully along the perimeter of the ceiling. Use slow, steady strokes to prevent splattering. If you have steady hands, you can avoid taping the ceiling by keeping a consistent hand close to the wall.
- Feather the Paint: As you move further from the edges, feather the paint into the ceiling to blend with the roller marks later.
B. Using the Roller for Even Application
Once the edges are done, it’s time to use the roller to paint the rest of the ceiling.
- Loading the Roller: Dip the roller into the tray and roll off any excess paint. Don’t overload the roller, as too much paint can lead to drips and splatters.
- Roll in Sections: Work in small sections of about 3×3 feet. Start rolling in a ‘W’ or ‘M’ motion, which helps to distribute the paint more evenly and reduces the risk of splattering.
- Use Light Pressure: Avoid pressing too hard on the roller, as this can cause paint to squirt or drip. Let the roller do the work by applying gentle, consistent pressure.
- Overlap Strokes: Overlap each stroke slightly with the previous one to ensure smooth coverage and avoid roller marks.
Dealing with Splatter: What to Do If It Happens
Even with the best preparation and technique, small splatters may occur. Knowing how to handle them quickly and effectively will prevent them from becoming a bigger problem.
Steps to Clean Up Splatter:
- Wet Paint: If you notice any paint splatters on the walls or floor, immediately wipe them up with a damp cloth. Wet paint is much easier to clean than dry paint.
- Dry Paint: For dried paint splatters, use a plastic scraper or your fingernail to gently lift the paint from the surface. Avoid using metal tools as they can damage the surface underneath.
- Cleaning Walls: If paint splatters on the walls, use a small amount of paint thinner on a clean cloth to remove it. Be sure to test the thinner on a small, inconspicuous area first to avoid damaging the paint.
Alternative Methods to Minimize Splatter
For those looking to avoid splatters entirely, consider these alternative methods and tips for achieving a mess-free ceiling painting job.
A. Use a Paint Sprayer
A paint sprayer can help minimize splatters and provide an even coat of paint. However, using a sprayer requires more preparation, including covering all surfaces in the room and ensuring proper ventilation.
B. Ceiling Paint Pads
Ceiling paint pads are a great alternative to rollers. They allow for precise application with minimal splattering. Pads work well for both large areas and edges, providing a smooth finish without the mess.
C. Two-Person Team
Having a second person assist you can also reduce splatters. One person can focus on rolling while the other follows behind with a brush or cloth to catch any drips or splatters that may occur.
Final Tips for a Professional Finish
To ensure your ceiling painting project looks professional and splatter-free, follow these final tips.
A. Paint in Natural Light
Painting in natural light allows you to see any missed spots or uneven areas more clearly. This helps you apply a more consistent coat of paint, reducing the need for touch-ups and preventing splatters caused by rushing or poor visibility.
B. Use an Extension Pole
An extension pole allows you to paint the ceiling from the floor, reducing the need to move ladders and preventing accidents that can lead to splatters.
C. Multiple Thin Coats
Rather than applying one thick coat of paint, opt for multiple thin coats. Thin coats dry faster, reducing the chance of drips and splatters.
D. Allow Adequate Drying Time
Be sure to allow the paint to dry fully between coats. If the paint is still wet, additional coats may cause streaking or splattering.
Aftercare and Maintenance
Once your ceiling has been painted, it’s important to take care of your newly painted surface to keep it looking fresh and clean.
A. Inspect for Touch-Ups
After the paint has dried, inspect the ceiling for any spots you may have missed. If you find any areas that need additional coverage, lightly touch them up using a small brush.
B. Cleaning the Ceiling
Over time, dust and dirt can accumulate on the ceiling. Use a soft broom or vacuum with a brush attachment to gently clean the ceiling. Avoid scrubbing too hard, as this can damage the paint.
C. Dealing with Stains
If stains or marks appear on your painted ceiling, clean them with a mild detergent and water solution. Avoid abrasive cleaners as they can damage the paint finish.
Conclusion
Painting a ceiling without splattering can seem daunting, but with the right preparation, tools, and techniques, you can achieve a professional finish. By following this guide, you’ll not only keep your ceiling looking smooth and clean but also avoid unnecessary mess and frustration.
Whether you’re a seasoned DIYer or new to home improvement projects, taking the time to do things properly will ensure a flawless result that enhances your room’s appearance for years to come. Happy painting!


