Installing a ceiling light fixture can be an excellent way to upgrade your home’s lighting and overall ambiance. However, it can seem like a daunting task if there’s no existing wiring in the location where you want to install the light.
Whether you’re adding more illumination to a dark room or transforming your living space with new lighting fixtures, learning how to install a ceiling light without existing wiring is entirely achievable with the right approach.
This guide will walk you through the process step-by-step, using simple terms and detailed instructions. From planning the installation to ensuring safety, you will find everything you need to know to successfully install your ceiling light fixture, even without existing electrical connections.
You won’t need to be an electrician to follow along, but as always, be sure to prioritize safety and follow the necessary precautions when working with electricity.
Tools and Materials You’ll Need:
Before starting the installation process, make sure you have the necessary tools and materials:
- Wireless or battery-powered ceiling light fixture (optional)
- Surface-mount lighting kit (if preferred)
- Cordless drill
- Screwdriver
- Drywall saw
- Tape measure
- Wire staples
- Wire nuts
- Electrical cable (if planning to connect to an existing power source)
- Toggle bolts or anchors
- Cable clamps
- Ceiling light fixture
- Electrical tester
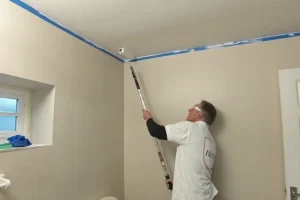
Step 1: Assessing Your Installation Area
The first step in the installation process is to assess where you want to install the ceiling light. Look at the ceiling’s structure and determine if there are any obstacles like beams or insulation that might interfere with the fixture.
Locating a Power Source
Since there is no existing wiring in the ceiling, you will need to identify where you will get power from. You can often tap into a nearby wall outlet, switch, or existing light fixture that has wiring you can extend to your new ceiling light. It’s essential to choose the right location that allows you to hide the cables neatly and safely.
Step 2: Choosing the Right Light Fixture
When installing a light without existing wiring, it’s essential to choose the right kind of fixture. Several options can help make installation easier:
- Wireless, Battery-Powered Ceiling Lights: These lights eliminate the need for complex wiring. They run on batteries and can be mounted directly to the ceiling with screws or adhesive. This is an easy option but might not provide the brightest light or long-lasting power.
- Surface-Mount Lighting Kits: These kits allow you to mount a fixture on the ceiling without cutting into drywall or running wires through walls. You’ll need to connect these lights to an existing power source, but they offer a semi-permanent solution.
- Plug-in Pendant Lights: If you want to avoid complex wiring altogether, a plug-in pendant light is a great option. These lights come with long cords that you can plug into an existing wall outlet, and they hang from the ceiling like regular light fixtures.
Step 3: Planning the Wiring Route
If you decide to hardwire your ceiling light, you’ll need to plan how to run the wire from the power source to the ceiling. This step involves mapping out the safest and cleanest route for the wiring.
Option 1: Running Wire Along the Wall Surface
One of the simplest methods of wiring a ceiling light without cutting into walls or ceilings is by running wire along the surface of your walls. You can secure the wire with cable staples and then cover it using a wire channel for a clean appearance.
Option 2: Hiding Wires Inside Walls
A more professional-looking solution is to run the electrical wires inside the walls and ceiling. This method requires more effort, as you will need to cut holes into the drywall to feed the wires through. Once the wires are placed, you can patch the drywall and paint it to match the rest of your wall or ceiling.
Option 3: Using a Plug-in Solution
If you’re using a plug-in ceiling light, running wiring may not be necessary. In this case, your only concern will be ensuring the cord is neatly fastened to the ceiling and wall. You can use cord covers to conceal the wire and give it a more polished look.
Step 4: Installing a Ceiling Electrical Box (If Necessary)
If you are hardwiring the light fixture, you’ll need to install an electrical box in the ceiling. An electrical box is a necessary component as it holds the wiring and supports the light fixture.
- Mark the Ceiling: Use a pencil to mark the spot where the electrical box will be placed. Make sure it is centered in the room or area where you want the light.
- Cut the Hole: Using a drywall saw, cut out a hole for the electrical box. Ensure the hole is the same size as the electrical box you’re installing.
- Mount the Electrical Box: Secure the electrical box into the ceiling using toggle bolts or anchors, which will help hold it firmly in place. If you’re mounting the light in a stud or beam, you can screw the electrical box directly into the wood.
Step 5: Running the Electrical Cable
If you are running an electrical cable from an existing power source, follow these steps:
- Turn Off Power: Before handling any electrical wiring, turn off the power to the room at the breaker box.
- Run Cable: Feed the electrical cable from your power source (wall outlet, switch, or existing light) to the ceiling where you’ve installed the electrical box. You may need to drill small holes to pass the cable through walls or ceiling beams.
- Secure the Cable: Use wire staples to secure the electrical cable along the walls or beams, ensuring that the wire is neatly tucked away and won’t sag or droop.
- Strip the Wires: Once the cable is in place, strip about ½ inch of insulation from the wires using a wire stripper.
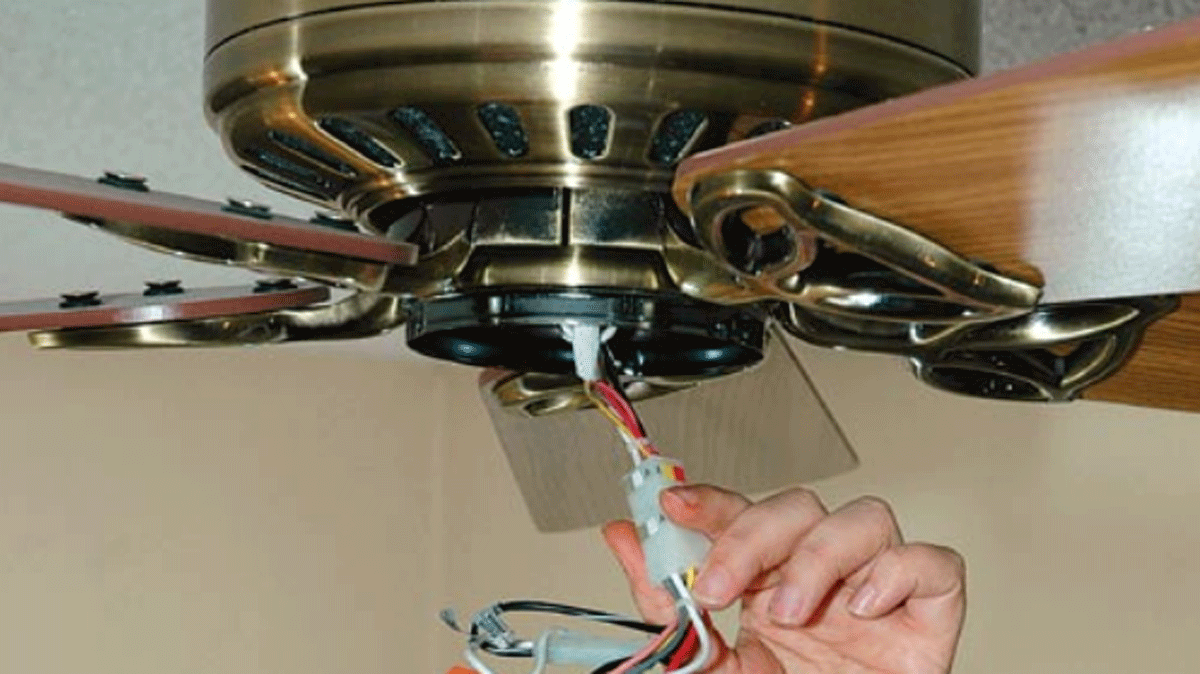
Step 6: Connecting the Wires
After you’ve run the electrical cable to the ceiling, it’s time to connect the wires to the light fixture.
- Match the Wires: Most ceiling light fixtures come with three wires: a black (hot), white (neutral), and green or copper (ground) wire. Match these wires to the corresponding wires from your electrical cable.
- Twist and Cap the Wires: Twist the exposed ends of the corresponding wires together (black to black, white to white, ground to ground), then cap each pair with wire nuts. This ensures a secure and safe connection.
- Test the Connection: Use an electrical tester to ensure that the connection is correct and that the fixture is receiving power.
Step 7: Mounting the Ceiling Light Fixture
With the wiring complete, it’s time to mount the ceiling light fixture to the electrical box:
- Secure the Fixture: Hold the light fixture against the electrical box and secure it with the mounting screws provided with the fixture. Make sure the fixture is level and tightly fastened.
- Attach the Cover: Many fixtures come with a decorative cover that hides the screws and electrical components. Attach this cover as the final step in mounting the fixture.
Step 8: Final Steps and Testing
Now that the ceiling light fixture is installed and wired, it’s time for the final checks:
- Turn On the Power: Go back to the breaker box and restore power to the room. Test the light switch to see if the fixture works properly.
- Adjust and Clean: If the fixture works correctly, you can now adjust any loose wires, tidy up the installation area, and clean the fixture to remove dust or fingerprints.
Step 9: Safety Tips and Maintenance
While installing a ceiling light fixture can be straightforward, it’s essential to follow a few safety guidelines to ensure the installation lasts and remains safe:
- Use the Right Tools: Always use appropriate tools, such as a voltage tester, to check the presence of electricity before touching wires.
- Don’t Overload Circuits: Ensure that the power source you’re tapping into can handle the additional load of the ceiling light fixture.
- Regular Maintenance: Check your light fixture periodically to ensure that it’s secure, and the wiring is intact. Clean the fixture to prevent dust buildup and maintain brightness.
Conclusion
Installing a ceiling light fixture without existing wiring may seem like a complex task, but with careful planning, the right tools, and attention to detail, it’s entirely possible to complete it yourself. Whether you opt for a wireless light fixture, run new wiring to a power source, or use a surface-mounted option, the results can greatly enhance your home’s lighting and aesthetic appeal.
By following the steps outlined in this guide, you can achieve a safe and functional ceiling light installation, bringing more brightness and functionality to any room in your home. Remember to prioritize safety throughout the process, and if you’re ever unsure about handling electrical work, don’t hesitate to consult a professional electrician.