Building a shed door with plywood is a practical and cost-effective way to enhance the functionality and appearance of your shed. Whether you’re replacing an old door or constructing a new one, this guide will walk you through the process step-by-step.
By the end of this guide, you’ll have all the knowledge and confidence you need to build a sturdy and attractive shed door with plywood. Let’s dive into the materials, tools, and techniques required to complete this project successfully.
Materials and Tools Needed
Materials:
- Plywood (3/4-inch thick is recommended)
- 2×4 lumber for framing
- Hinges (heavy-duty)
- Screws and nails
- Door handle and latch
- Wood glue
- Sandpaper
- Exterior paint or sealant
Tools:
- Circular saw or table saw
- Drill
- Screwdriver
- Measuring tape
- Carpenter’s square
- Clamps
- Hammer
- Paintbrush or roller
Step-by-Step Guide
Step 1: Measure and Plan
- Measure the Door Opening:
- Accurately measure the height and width of the door opening on your shed. Make sure to account for any trim or framing that will affect the size of the door.
- Determine Door Size:
- Based on your measurements, decide the dimensions of your shed door. Typically, you should make the door slightly smaller than the opening to allow for easy movement and installation of hinges.
- Create a Plan:
- Sketch a plan for your door, including the layout of the plywood and any framing or bracing you will add. This helps visualize the final product and ensures you have all necessary materials.
Step 2: Cut the Plywood
- Mark the Plywood:
- Using your measurements, mark the plywood sheet where it needs to be cut. Ensure your lines are straight and accurate by using a carpenter’s square.
- Cut the Plywood:
- Use a circular saw or table saw to cut the plywood to the desired size. Be sure to follow safety guidelines when using power tools, such as wearing protective eyewear and ensuring the wood is securely clamped.
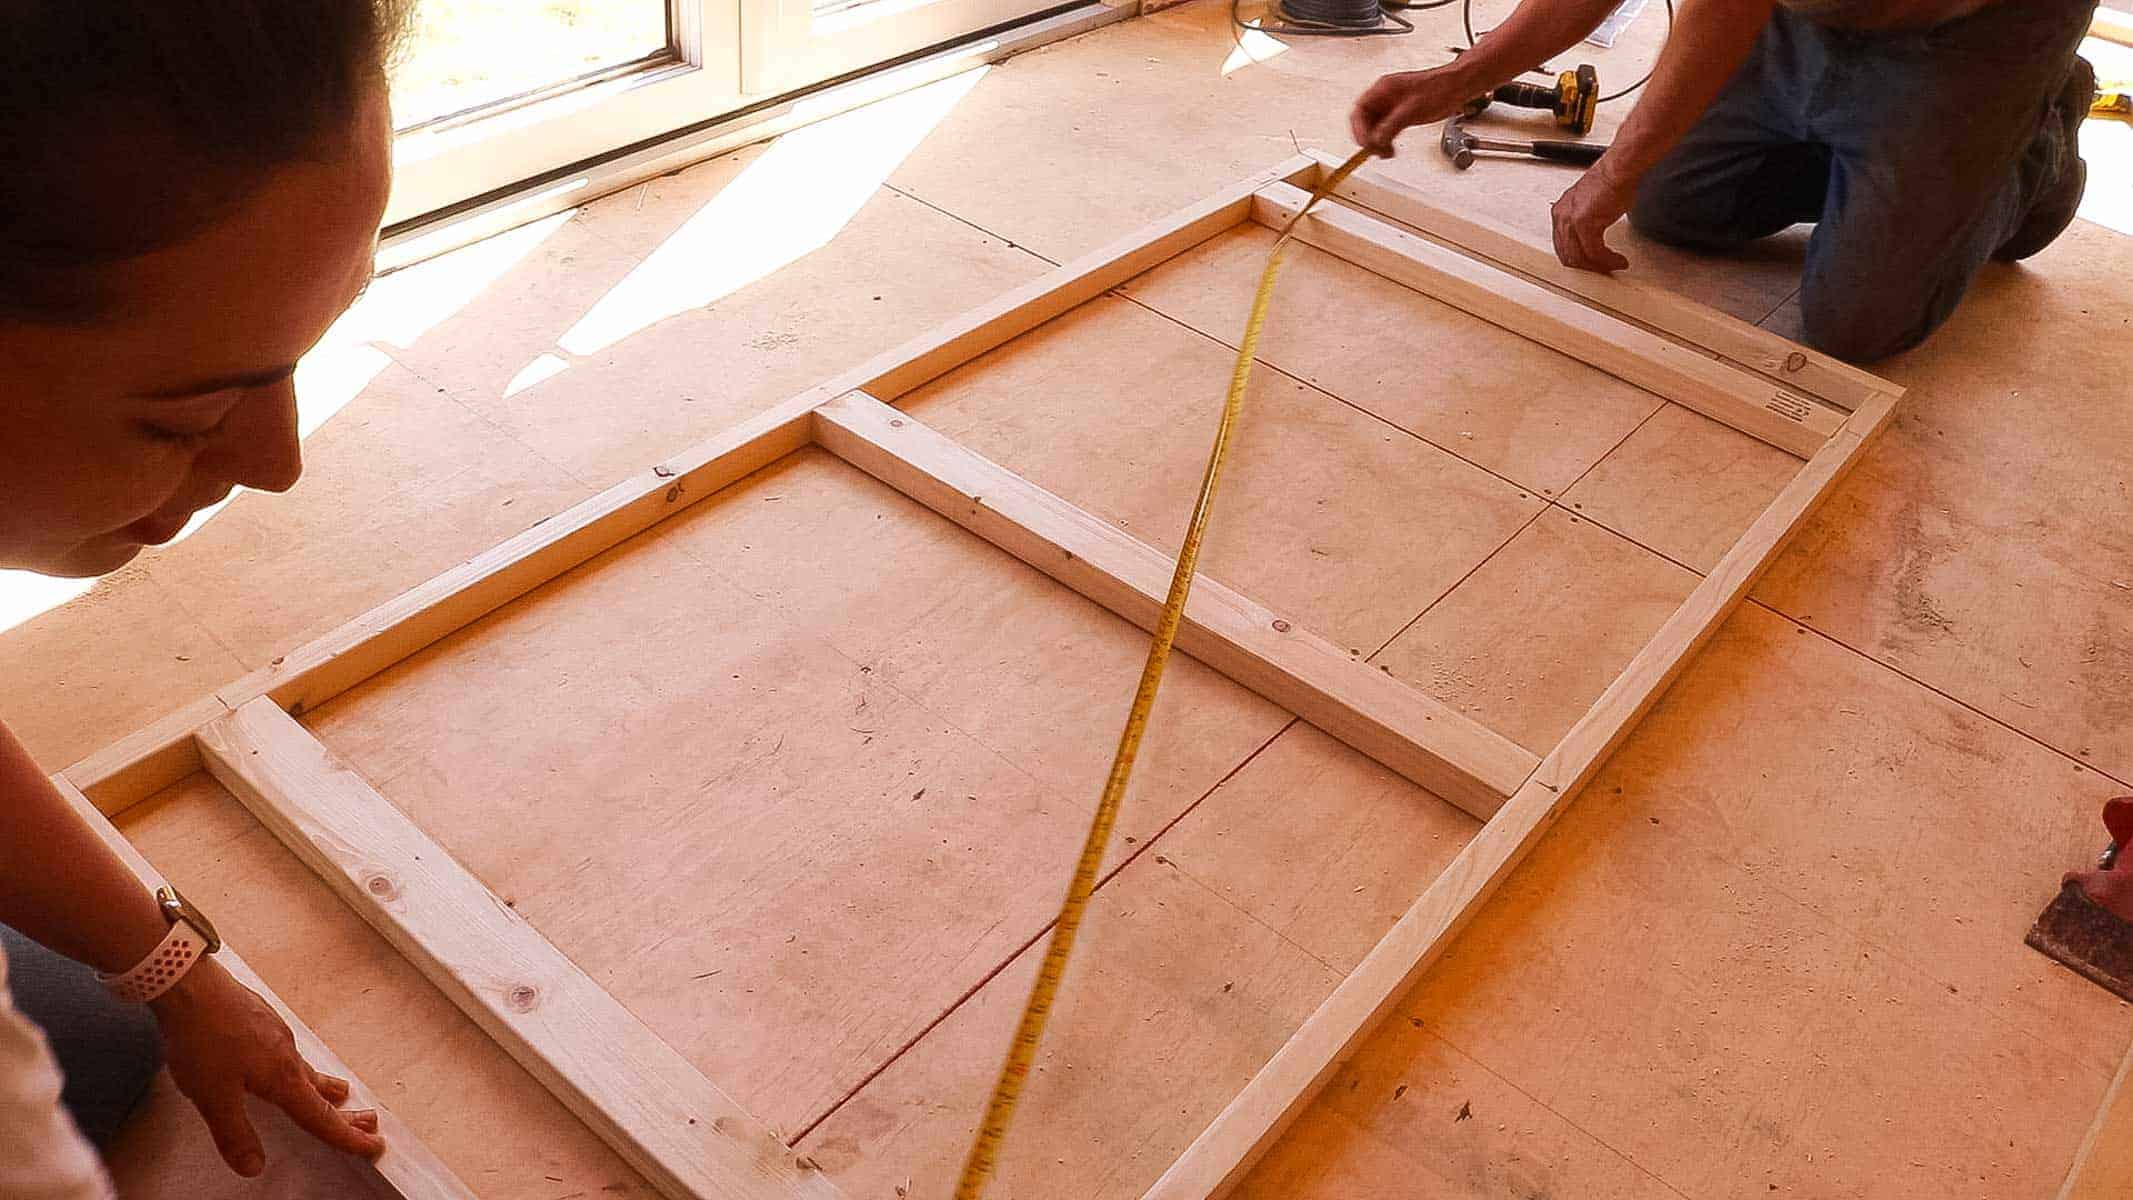
Step 3: Frame the Door
- Cut the 2x4s:
- Measure and cut the 2×4 lumber to create a frame for the door. You will need pieces for the top, bottom, and sides of the door, as well as any additional bracing you want to add for strength.
- Assemble the Frame:
- Lay out the cut 2x4s on a flat surface to form the frame. Use wood glue and screws to join the pieces together, ensuring the frame is square and securely fastened.
- Attach the Plywood to the Frame:
- Place the plywood sheet on top of the assembled frame. Align the edges carefully, then use screws or nails to attach the plywood to the frame. Space the fasteners evenly around the perimeter and along any internal bracing.
Step 4: Sand and Finish
- Sand the Door:
- Use sandpaper to smooth any rough edges or surfaces on the door. This helps prepare the wood for painting or sealing and ensures a professional-looking finish.
- Apply Paint or Sealant:
- Choose an exterior paint or sealant to protect your door from the elements. Apply a coat of primer first if you’re using paint, followed by one or two coats of your chosen finish. Allow each coat to dry completely before applying the next.
Step 5: Install Hinges and Hardware
- Mark Hinge Placement:
- Decide where you want to place the hinges on the door and mark these positions. Typically, one hinge should be placed near the top, one near the bottom, and one in the middle for added support.
- Attach Hinges to the Door:
- Use a drill and screws to attach the hinges to the door. Ensure they are aligned correctly and securely fastened.
- Install the Door Handle and Latch:
- Follow the manufacturer’s instructions to install the door handle and latch. Ensure they are positioned at a comfortable height and operate smoothly.
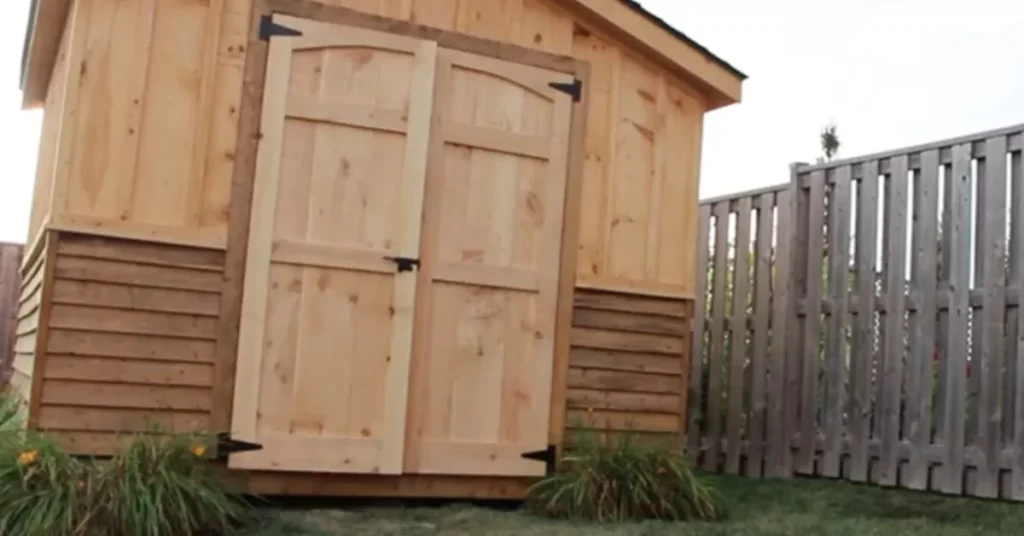
Step 6: Hang the Door
- Prepare the Door Frame:
- Make sure the door frame on the shed is clean and free of obstructions. If necessary, use a level to check that the frame is square and plumb.
- Hang the Door:
- With the help of a friend, lift the door into place and align the hinges with the corresponding spots on the shed frame. Use screws to attach the hinges to the frame, ensuring the door hangs evenly and swings smoothly.
- Test the Door:
- Open and close the door several times to ensure it operates correctly. Make any necessary adjustments to the hinges or hardware to achieve a perfect fit.
Tips for a Successful Project
- Double-Check Measurements:
- Always double-check your measurements before cutting any materials. Accurate measurements are crucial for a proper fit and smooth operation.
- Use Quality Materials:
- Invest in high-quality plywood and hardware to ensure your door is durable and long-lasting.
- Take Your Time:
- Don’t rush the project. Taking your time to carefully plan, measure, and assemble will result in a higher-quality door.
- Seek Help if Needed:
- If you’re unsure about any step of the process, seek advice from a knowledgeable friend or professional. It’s better to ask for help than to make costly mistakes.
- Maintain Your Tools:
- Ensure your tools are in good working condition before starting the project. Sharp blades and well-maintained equipment make the work easier and safer.
Conclusion
Building a shed door with plywood is a rewarding project that can significantly improve the functionality and appearance of your shed. By following this detailed guide, you can create a sturdy, attractive door that enhances your outdoor space.
Remember to plan carefully, use quality materials, and take your time to ensure the best results. With the right approach, you’ll have a beautiful new shed door that will serve you well for years to come.