Starting DIY projects can be an exciting journey, especially for beginners looking to personalize their living spaces. Whether you’re aiming to spruce up a room, create something functional, or just want to try your hand at a new hobby, DIY home projects offer a fantastic opportunity to learn new skills and make your home truly your own.
This guide is designed to help beginners navigate through some simple yet rewarding projects that don’t require advanced tools or extensive experience.
With clear instructions, you’ll be able to complete these projects with confidence and satisfaction, all while adding a personal touch to your home.
1. Wall Shelves
Adding shelves to your walls is a straightforward project that serves both a decorative and functional purpose. Wall shelves can hold books, plants, or decorative items, and they can be customized to fit any room.
Materials Needed:
- Wooden planks (size depending on your space)
- Shelf brackets
- Screws
- Drill
- Level
- Sandpaper
- Paint or stain (optional)
- Measuring tape
Steps:
- Measure and Cut the Wood: Measure the length of the wall where you want the shelf to be. Cut the wooden planks to your desired length.
- Sand and Paint: Sand the wood to smooth out any rough edges. If you want to paint or stain the wood, do so now and allow it to dry.
- Position the Brackets: Use the level to ensure your shelf will be straight. Mark the spots where the brackets will be mounted.
- Attach the Brackets: Drill the brackets into the wall at the marked spots. Make sure they are securely attached.
- Mount the Shelf: Place the wooden plank on the brackets and screw it in place.
- Decorate: Once the shelf is secured, you can place your books, plants, or decorative items on it.
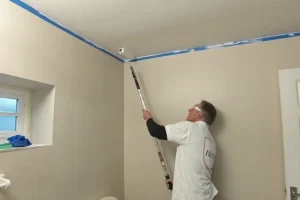
2. Painted Accent Wall
A painted accent wall can dramatically change the look of a room with minimal effort. It’s a great way to add color and personality to your space without committing to painting an entire room.
Materials Needed:
- Paint (color of your choice)
- Paint roller and brushes
- Painter’s tape
- Drop cloth
- Ladder (if needed)
- Measuring tape
Steps:
- Choose the Wall and Color: Pick a wall that you want to highlight and select a color that complements the rest of the room.
- Prepare the Area: Move furniture away from the wall and cover the floor with a drop cloth. Use painter’s tape to protect edges and trim.
- Apply the Paint: Start by cutting in the edges with a brush, then use a roller to fill in the larger areas. Apply a second coat if necessary.
- Remove the Tape: Carefully remove the painter’s tape before the paint fully dries to avoid peeling.
- Let It Dry: Allow the paint to dry completely before moving furniture back against the wall.
3. Simple Floating Desk
A floating desk is a sleek, space-saving solution for small rooms or home offices. It’s also a relatively easy project for beginners.
Materials Needed:
- Wooden plank (for the desk surface)
- L-brackets
- Screws
- Drill
- Level
- Sandpaper
- Paint or stain (optional)
Steps:
- Measure and Cut the Wood: Determine the size of the desk based on your available space. Cut the wooden plank accordingly.
- Sand and Paint: Sand the wood and apply paint or stain if desired.
- Position the Brackets: Use the level to mark where the brackets will be mounted on the wall.
- Attach the Brackets: Drill the brackets into the wall, ensuring they are level and secure.
- Mount the Desk: Place the wooden plank on the brackets and screw it in place.
- Finish: Your floating desk is now ready to use. Add a chair and your office essentials to complete the setup.
4. Upcycled Furniture
Upcycling old furniture is an eco-friendly way to give new life to items you already have. This project is perfect for beginners who want to experiment with creativity and sustainability.
Materials Needed:
- Old furniture piece (e.g., a chair, table, or dresser)
- Sandpaper
- Paint or stain
- Paintbrushes
- New hardware (optional)
- Screwdriver
- Drop cloth
Steps:
- Choose Your Furniture: Select an old piece of furniture that you want to transform.
- Sand the Surface: Sand down any old paint or varnish to create a smooth surface for the new finish.
- Apply Paint or Stain: Paint or stain the furniture in the color of your choice. You may need to apply multiple coats for full coverage.
- Replace Hardware (Optional): If your furniture has drawers or doors, consider replacing the old handles or knobs with new ones.
- Let It Dry: Allow the paint or stain to dry completely before using the furniture.
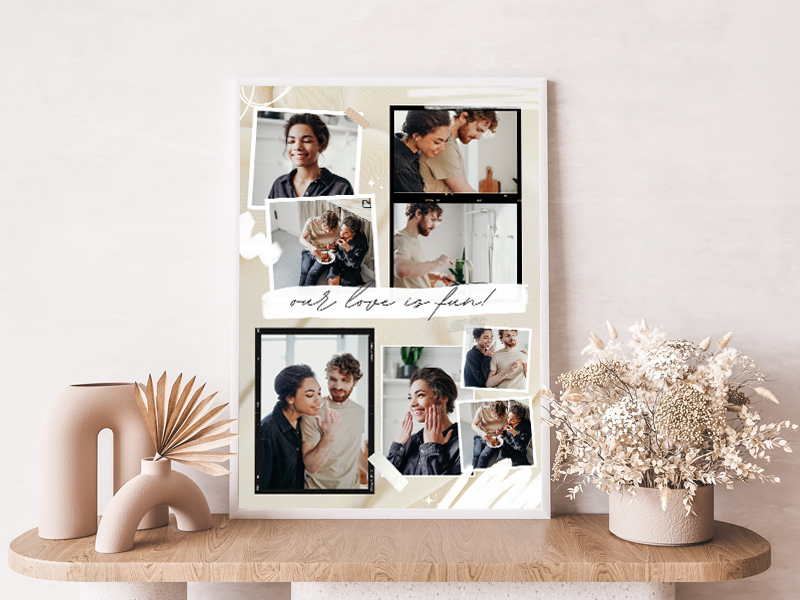
5. Personalized Photo Frame
Creating a personalized photo frame is a simple yet meaningful DIY project. It’s perfect for displaying your favorite memories in a unique way.
Materials Needed:
- Plain wooden frame
- Paint or stain
- Decorative items (e.g., buttons, beads, fabric)
- Glue
- Paintbrushes
Steps:
- Paint or Stain the Frame: Choose a color that complements your décor and paint or stain the frame. Allow it to dry.
- Decorate the Frame: Use glue to attach decorative items like buttons, beads, or fabric to the frame. Get creative and personalize it to your taste.
- Insert a Photo: Once the frame is dry, insert a photo and place it on display.
6. Planter Box
Building a planter box is a great project for beginners who enjoy gardening. A simple wooden box can be used to grow flowers, herbs, or small vegetables.
Materials Needed:
- Wooden planks
- Screws
- Drill
- Measuring tape
- Sandpaper
- Paint or stain (optional)
- Soil and plants
Steps:
- Measure and Cut the Wood: Determine the size of your planter box and cut the wooden planks accordingly.
- Assemble the Box: Use screws to attach the planks together to form a box.
- Sand and Paint: Sand the edges of the box and paint or stain it if desired.
- Fill with Soil: Once the box is assembled and dry, fill it with soil and plant your flowers, herbs, or vegetables.
- Place the Planter: Position your planter box in a sunny spot and water regularly.
7. Custom Coat Rack
A custom coat rack is a functional addition to any entryway. This project allows you to create a rack that fits your space and style.
Materials Needed:
- Wooden board
- Coat hooks
- Screws
- Drill
- Sandpaper
- Paint or stain (optional)
- Measuring tape
- Level
Steps:
- Cut and Sand the Wood: Cut the wooden board to your desired length and sand the edges.
- Paint or Stain the Board: Apply paint or stain to match your décor and allow it to dry.
- Attach the Hooks: Evenly space the coat hooks along the board and screw them in place.
- Mount the Coat Rack: Use a level to ensure the coat rack is straight, then drill it into the wall.
- Hang Your Coats: Your custom coat rack is now ready for use.
8. Mason Jar Organizers
Mason jar organizers are a stylish way to keep small items like bathroom supplies or kitchen utensils in order. This project is easy and requires minimal materials.
Materials Needed:
- Mason jars
- Hose clamps
- Wooden board
- Screws
- Drill
- Sandpaper
- Paint or stain (optional)
- Measuring tape
- Level
Steps:
- Prepare the Wooden Board: Cut and sand the board to your desired size. Paint or stain if desired.
- Attach the Hose Clamps: Evenly space the hose clamps on the board and screw them in place.
- Mount the Board: Use a level to ensure the board is straight, then drill it into the wall.
- Secure the Mason Jars: Place the mason jars into the hose clamps and tighten them.
- Organize Your Items: Fill the jars with items like brushes, pens, or kitchen utensils.
9. Simple Pallet Coffee Table
A pallet coffee table is an inexpensive and rustic piece of furniture that can be built with minimal tools and materials. It’s perfect for beginners looking to create something functional.
Materials Needed:
- Wooden pallet
- Sandpaper
- Paint or stain
- Casters (optional)
- Screws
- Drill
- Measuring tape
Steps:
- Sand the Pallet: Sand the entire pallet to remove any rough edges or splinters.
- Paint or Stain: Apply paint or stain to the pallet, and allow it to dry.
- Attach Casters (Optional): If you want your coffee table to be mobile, screw casters onto the bottom corners of the pallet.
- Place in Your Living Room: Position your new coffee table in your living room and enjoy your handiwork.
10. Handmade Doormat
Creating a handmade doormat is a fun and easy project that allows you to welcome guests with a personal touch.
Materials Needed:
- Coir mat
- Stencils
- Paint
- Paintbrushes
- Painter’s tape
Steps:
- Prepare the Mat: Lay the coir mat flat on a drop cloth.
- Position the Stencils: Place the stencils on the mat and secure them with painter’s tape.
- Apply the Paint: Use a paintbrush to apply paint within the stencils. Remove the stencils carefully once the paint is dry.
- Let It Dry: Allow the mat to dry completely before placing it at your doorstep.
11. Simple Picture Ledge
A picture ledge is a stylish way to display photos, art, or small decorative items. It’s a beginner-friendly project that adds visual interest to any wall.
Materials Needed:
- Wooden board
- L-brackets
- Screws
- Drill
- Sandpaper
- Paint or stain (optional)
- Measuring tape
- Level
Steps:
- Cut and Sand the Wood: Cut the wooden board to your desired length and sand the edges.
- Paint or Stain: Apply paint or stain to match your décor and allow it to dry.
- Attach the L-Brackets: Secure the L-brackets to the board, making sure they are evenly spaced.
- Mount the Ledge: Use a level to ensure the ledge is straight, then drill it into the wall.
- Decorate: Place your photos, art, or decorative items on the ledge.
12. Custom Drawer Dividers
Custom drawer dividers are a simple project that helps keep your drawers organized. This is particularly useful in kitchens, bathrooms, or home offices.
Materials Needed:
- Thin wooden slats
- Saw
- Sandpaper
- Wood glue
- Measuring tape
Steps:
- Measure the Drawer: Measure the interior dimensions of the drawer and decide how many dividers you want.
- Cut the Slats: Cut the wooden slats to fit the dimensions of the drawer.
- Sand the Edges: Sand the edges of the slats to ensure they fit smoothly into the drawer.
- Assemble the Dividers: Arrange the slats in the drawer to form the desired compartments. Use wood glue to secure them in place if necessary.
- Organize Your Items: Fill the compartments with items like utensils, office supplies, or cosmetics.
Conclusion
These DIY home projects are ideal for beginners, offering a variety of ways to enhance your living space with minimal tools and experience.
From wall shelves to personalized photo frames, each project is designed to be manageable and rewarding, helping you to develop your DIY skills while adding a personal touch to your home.
Remember, the key to successful DIY projects is patience, creativity, and enjoying the process of making something with your own hands.