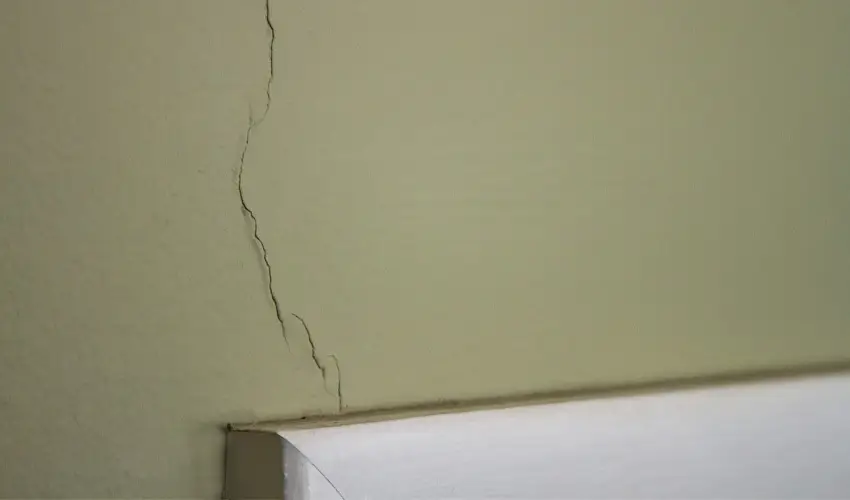
Drywall cracks in corners are a common issue in many homes, often caused by settling, temperature fluctuations, or even poor initial construction. These cracks can be unsightly and, if left unattended, may worsen over time, leading to more extensive damage.
Repairing drywall cracks, especially in corners, might seem like a daunting task, but with the right approach, tools, and materials, you can tackle it yourself and achieve a seamless finish.
This guide will walk you through the step-by-step process of repairing drywall cracks in corners, from gathering the necessary tools to applying the finishing touches. With patience and attention to detail, you can restore the appearance of your walls, maintain the integrity of your home, and save on costly repairs in the future.
Whether you’re dealing with minor hairline cracks or more substantial damage, this comprehensive guide will help you achieve professional-looking results.
1. Understanding the Causes of Drywall Cracks in Corners
Before diving into the repair process, it’s important to understand why drywall cracks occur, especially in corners. Several factors can contribute to this issue:
- Settling of the House: As a house settles over time, the foundation and structure may shift slightly, causing stress on the walls and leading to cracks, particularly in corners where two walls meet.
- Temperature and Humidity Changes: Fluctuations in temperature and humidity can cause the drywall to expand and contract, which can result in cracking over time.
- Poor Construction Practices: In some cases, cracks can occur due to poor installation, such as using the wrong type of drywall or not securing it properly to the framing.
- Natural Wear and Tear: Over time, natural wear and tear can also cause cracks to form in drywall, especially in older homes.
2. Gathering the Necessary Tools and Materials
To successfully repair drywall cracks in corners, you will need the following tools and materials:
- Utility knife
- Drywall tape (paper or mesh)
- Joint compound (also known as drywall mud)
- Taping knife (4-inch and 6-inch sizes)
- Sanding sponge or sandpaper (fine-grit)
- Putty knife
- Drop cloths or plastic sheeting
- Painter’s tape
- Safety goggles and dust mask
Make sure to gather all these items before you start to ensure a smooth and efficient repair process.
3. Preparing the Area for Repair
Proper preparation is key to achieving a clean and professional-looking repair. Here’s how to prepare the area:
- Clear the Space: Remove any furniture, decorations, or obstacles from the area where you will be working. Lay down a drop cloth or plastic sheeting to protect the floor.
- Clean the Surface: Use a damp cloth to wipe down the area around the crack, removing any dust, dirt, or debris. This ensures that the joint compound adheres properly.
- Protect Adjacent Surfaces: Apply painter’s tape around the area you will be working on to protect trim, ceilings, or adjacent walls from any accidental spills or splatters.
4. Cutting Away Damaged Drywall
Before you can start repairing the crack, it is important to remove any loose or damaged drywall material:
- Score Along the Crack: Use a utility knife to score along the length of the crack, cutting through the paint and any loose drywall paper. Be careful not to cut too deeply into the drywall itself.
- Remove Loose Material: Gently pull away any loose or damaged pieces of drywall. If the crack has caused any bubbling or peeling, make sure to remove these areas as well to create a smooth surface for repair.
5. Applying Drywall Tape
Using drywall tape is essential for reinforcing the repair and preventing future cracks. There are two main types of tape: paper tape and mesh tape. Both can be effective, but paper tape is often preferred for corners.
- Cut the Tape: Cut a piece of drywall tape to fit the length of the crack. If you are working in an inside corner, you will need to crease the paper tape along its center to form a 90-degree angle that fits snugly into the corner.
- Position the Tape: Press the tape firmly over the crack, making sure it is centered and aligned properly. For inside corners, press the tape into the corner crease so that it adheres to both walls.
6. Applying the First Coat of Joint Compound
Now that the tape is in place, it’s time to apply the first coat of joint compound:
- Mix the Joint Compound: If you are using a pre-mixed joint compound, give it a good stir to ensure it is smooth and free of lumps. For powdered joint compound, mix it according to the manufacturer’s instructions until it reaches a smooth, workable consistency.
- Apply the Compound: Use a 4-inch taping knife to apply a thin layer of joint compound over the tape. Start from the top of the crack and work your way down, smoothing the compound as you go. Make sure to feather the edges of the compound to blend it with the surrounding wall.
- Let it Dry: Allow the first coat of joint compound to dry completely. This may take several hours, depending on the humidity and temperature in your home. Check the manufacturer’s instructions for specific drying times.
7. Sanding and Smoothing the Surface
Once the first coat of joint compound is dry, it’s time to smooth the surface:
- Sand the Area: Use a fine-grit sanding sponge or sandpaper to gently sand the dried joint compound. Focus on smoothing out any rough spots or ridges, but be careful not to sand too much and damage the tape.
- Wipe Away Dust: After sanding, use a damp cloth or a vacuum with a brush attachment to remove any dust from the area. This helps ensure the next coat of joint compound adhere properly.
8. Applying Additional Coats of Joint Compound
Most drywall repairs require multiple coats of joint compound to achieve a smooth, seamless finish:
- Apply the Second Coat: Use a 6-inch taping knife to apply a second, slightly wider coat of joint compound over the first. Feather the edges further out to blend the compound with the surrounding wall. This coat should be slightly thicker than the first but still smooth and even.
- Let it Dry and Sand Again: Allow the second coat to dry completely, then sand it lightly to remove any imperfections. Clean the surface again to remove dust.
- Apply a Third Coat (if needed): If the crack is still visible or the surface is not perfectly smooth, apply a third, very thin coat of joint compound, feathering the edges even further. Allow it to dry and sand as needed.
9. Priming and Painting the Repaired Area
Once the joint compound is dry and sanded to a smooth finish, it’s time to prime and paint the repaired area:
- Apply Primer: Use a paintbrush or roller to apply a coat of primer over the repaired area. Primer helps the paint adhere properly and provides a uniform base, especially if you are painting over a patched surface.
- Let the Primer Dry: Allow the primer to dry according to the manufacturer’s instructions. This usually takes a few hours.
- Paint the Area: Once the primer is dry, apply paint to match the rest of the wall. Use a paintbrush for corners and edges and a roller for larger areas. Depending on the paint type and color, you may need to apply two coats for full coverage.
10. Tips for Achieving a Professional Finish
To achieve the best results when repairing drywall cracks in corners, consider the following tips:
- Work in a Well-Lit Area: Good lighting helps you see the crack clearly and apply joint compound evenly. Use portable work lights if necessary.
- Use Quality Materials: Invest in good-quality joint compound, tape, and tools to ensure a long-lasting repair.
- Practice Patience: Take your time with each step, allowing the compound to dry completely before sanding or applying additional coats.
11. Preventing Future Drywall Cracks
To minimize the risk of future cracks, take these preventive measures:
- Control Humidity Levels: Use a dehumidifier or air conditioner to maintain consistent humidity levels in your home. This helps prevent drywall from expanding and contracting due to moisture changes.
- Address Structural Issues: If you notice recurring cracks in the same area, it could indicate a structural problem. Consult a professional contractor to assess and address any underlying issues.
- Reinforce Corners During Construction: When building or renovating, use corner bead or metal corner reinforcement to strengthen drywall corners and prevent future cracking.
12. Common Mistakes to Avoid
Repairing drywall cracks in corners can be challenging, especially for beginners. Here are some common mistakes to avoid:
- Applying Too Much Compound: Applying too much joint compound at once can lead to uneven drying and cracking. Always start with thin, even layers and build up as needed.
- Skipping Sanding Between Coats: Sanding between coats is essential for achieving a smooth finish. Skipping this step can result in a rough, uneven surface.
- Ignoring Safety Precautions: Always wear safety goggles and a dust mask when sanding to protect yourself from dust and debris.
13. Repairing Different Types of Drywall Cracks
Not all cracks are the same, and the repair approach may vary depending on the type:
- Hairline Cracks: For very thin, hairline cracks, a single coat of joint compound may be sufficient. Use a putty knife to apply a small amount of compound directly into the crack, then sand and paint as needed.
- Larger Cracks: For wider cracks, you may need to apply multiple coats of compound and use drywall tape for reinforcement.
- Cracks in High-Traffic Areas: Cracks in high-traffic areas, such as hallways or near doors, may require additional reinforcement, like a metal corner bead or fiberglass mesh tape, to withstand daily wear and tear.
14. When to Call a Professional
While many drywall cracks can be repaired with DIY methods, there are situations where calling a professional may be the best option:
- Extensive Damage: If the crack is large, widespread, or caused by a significant structural issue, a professional can assess and repair it correctly.
- Reoccurring Cracks: If you’ve repaired the same crack multiple times and it keeps returning, a professional may be needed to identify the underlying cause.
- Limited Time or Experience: If you’re short on time or not confident in your skills, hiring a professional can ensure a smooth and efficient repair.
Conclusion
Repairing drywall cracks in corners is a task that homeowners can often handle themselves with the right tools, materials, and techniques. By following the steps outlined in this guide, you can achieve a professional-looking repair that not only improves the appearance of your home but also maintains its structural integrity.
Remember to take your time, use quality materials, and prioritize safety throughout the process. If you encounter more complex issues or feel unsure about any step, don’t hesitate to seek professional assistance.
With patience and attention to detail, you can restore your walls to their original, flawless condition.