Pebble tile shower floors have become a popular choice for homeowners looking to add a natural and aesthetically pleasing touch to their bathrooms. These unique tiles can transform a standard shower into a spa-like retreat, offering both visual appeal and a soothing tactile experience.
However, as with any flooring material, pebble tiles come with their own set of challenges. Understanding these potential problems and knowing how to address them can help ensure that your pebble tile shower floor remains beautiful and functional for years to come.
In this detailed guide, we will explore common issues associated with pebble tile shower floors and provide practical solutions to help you maintain your bathroom’s beauty and functionality.
Common Problems with Pebble Tile Shower Floors
1. Grout Deterioration
Issue: One of the most common problems with pebble tile shower floors is grout deterioration. Over time, grout can crack, crumble, and wear away due to constant exposure to water and cleaning products.
Solution: Regularly inspect the grout for signs of wear and tear. Use a high-quality, waterproof grout sealer to protect the grout from moisture and staining. If the grout begins to deteriorate, consider regrouting the affected areas. Choose a grout that is specifically designed for use in wet environments.
2. Uneven Surface
Issue: The uneven surface of pebble tiles can cause discomfort when standing or walking on them. The varying heights of the pebbles can also create tripping hazards.
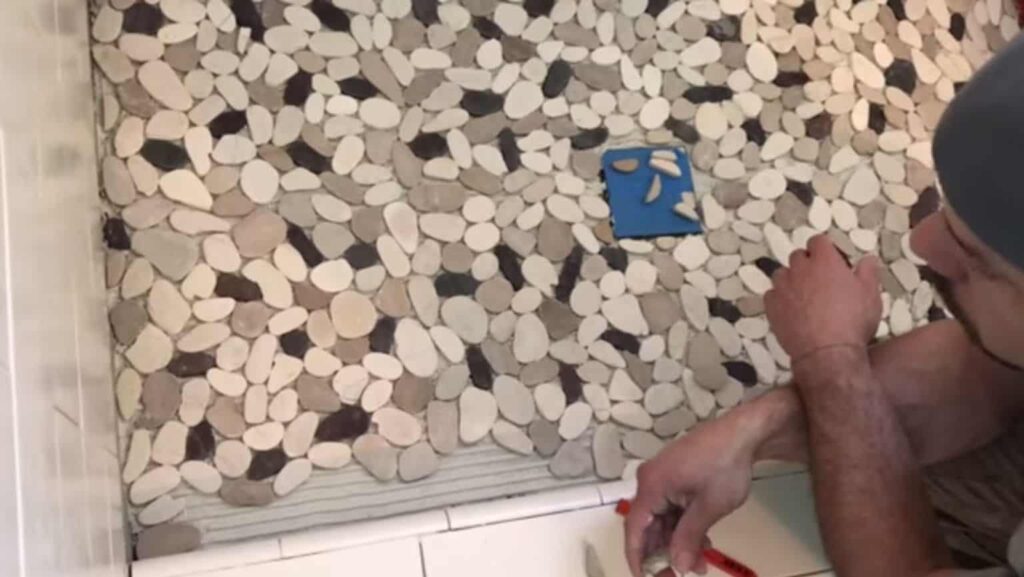
Solution: During installation, ensure that the pebbles are set as evenly as possible. Use a rubber mallet to gently tap the pebbles into place, creating a more uniform surface. If the floor is already installed and uneven, consider adding a layer of clear epoxy to level the surface while maintaining the natural look of the pebbles.
3. Water Drainage Issues
Issue: Improper drainage can lead to water pooling on the shower floor, which can cause mold and mildew growth, as well as damage to the tiles and grout.
Solution: Ensure that the shower floor is sloped correctly towards the drain. The recommended slope is a 1/4 inch drop per foot. If the slope is insufficient, you may need to consult a professional to re-slope the floor. Regularly clean the drain to prevent clogs that can lead to water buildup.
4. Slippery Surface
Issue: Pebble tile floors can become slippery when wet, posing a safety risk.
Solution: Choose pebbles with a natural, textured finish rather than polished ones to increase traction. Applying a non-slip coating to the pebble tile surface can also help reduce slipperiness. Ensure the shower floor is kept clean and free of soap scum and other residues that can make the surface slippery.

5. Maintenance and Cleaning Challenges
Issue: Pebble tile floors can be more challenging to clean than smooth tile floors due to the uneven surface and numerous grout lines.
Solution: Use a soft-bristled brush to clean the pebble tiles and grout lines. Avoid using harsh chemicals that can damage the grout and pebbles. A mixture of vinegar and water can be an effective and gentle cleaning solution. Regularly apply a sealant to the pebbles and grout to protect them from stains and moisture.
Detailed Guide to Maintaining Pebble Tile Shower Floors
Step 1: Regular Inspection
Perform regular inspections of your pebble tile shower floor. Look for signs of grout deterioration, loose pebbles, or water pooling. Early detection of problems can prevent more significant issues down the line.
Step 2: Proper Cleaning Techniques
- Daily Cleaning: Rinse the shower floor with warm water after each use to remove soap residue and prevent buildup.
- Weekly Cleaning: Use a soft-bristled brush and a mild cleaning solution, such as a mixture of vinegar and water, to scrub the pebbles and grout lines. Rinse thoroughly with warm water.
- Monthly Cleaning: Deep clean the shower floor with a specialized stone cleaner. Follow the manufacturer’s instructions and ensure the cleaner is safe for use on natural stone.
Step 3: Sealing the Pebbles and Grout
Apply a high-quality, waterproof sealant to the pebbles and grout lines every 6 to 12 months. This helps protect the tiles from moisture, stains, and mold growth. Follow these steps for sealing:
- Clean the Surface: Ensure the pebble tiles and grout are clean and dry before applying the sealant.
- Apply the Sealant: Use a paintbrush or a sponge to apply the sealant evenly across the surface.
- Allow to Dry: Let the sealant dry for the recommended time, usually 24 hours, before using the shower.
Step 4: Addressing Grout Issues
If you notice the grout starting to deteriorate, it’s essential to address it promptly:
- Remove Old Grout: Use a grout removal tool to carefully remove the damaged grout without harming the surrounding pebbles.
- Clean the Area: Clean the area thoroughly to remove any debris or dust.
- Apply New Grout: Use a grout specifically designed for wet environments. Apply the grout using a rubber float, ensuring it fills all gaps between the pebbles.
- Seal the Grout: Once the grout has cured, apply a grout sealer to protect it from moisture and stains.
Step 5: Enhancing Traction
To reduce the slipperiness of the pebble tile floor:
- Choose Textured Pebbles: When selecting pebble tiles, opt for those with a natural, textured finish rather than polished ones.
- Non-Slip Coating: Apply a non-slip coating designed for use on stone surfaces. Follow the manufacturer’s instructions for application and drying times.
- Clean Regularly: Keep the shower floor clean and free of soap scum and other residues that can make the surface slippery.
Step 6: Ensuring Proper Drainage
Proper drainage is crucial to prevent water pooling and related issues:
- Check the Slope: Ensure the shower floor is sloped correctly towards the drain. The recommended slope is a 1/4 inch drop per foot.
- Clean the Drain: Regularly clean the drain to prevent clogs that can cause water buildup. Remove any hair or debris that may obstruct water flow.
- Professional Help: If you notice persistent drainage issues, consult a professional to assess and correct the slope of the shower floor.
Step 7: Repairing Loose Pebbles
If any pebbles become loose or dislodged:
- Remove the Loose Pebble: Carefully remove the loose pebble and any remaining adhesive.
- Clean the Area: Clean the area thoroughly to remove any debris or old adhesive.
- Reapply Adhesive: Apply a waterproof adhesive suitable for use with natural stone. Press the pebble firmly into place.
- Regrout if Necessary: If the surrounding grout is damaged, regrout the area and seal it once it has cured.
Conclusion
Maintaining a pebble tile shower floor requires regular care and attention to detail. By addressing common issues such as grout deterioration, uneven surfaces, water drainage problems, slippery surfaces, and cleaning challenges, you can ensure that your shower floor remains both beautiful and functional.
Regular inspections, proper cleaning techniques, sealing, and addressing any problems promptly will help prolong the life of your pebble tile shower floor. With these steps, you can enjoy the natural beauty and spa-like feel of your pebble tile shower for years to come.